Yes, You Can Paint Over Iron on Transfer, but ensure the paint is fabric-compatible. Use soft fabric paints to maintain flexibility and prevent cracking.
Starting on a creative project often ignites the question of the versatility and adaptability of materials, such as whether one can paint over iron-on transfers.
This is a common query for craft enthusiasts and DIYers looking to customize textiles with a personal touch.
The answer lies not just in the possibility but in the method; using the right type of paint ensures longevity and aesthetic appeal.
Specialized fabric paints offer a solution that can adhere to the transferred image without peeling or flaking, thus preserving your design even through washes.
Remember to set the paint according to the manufacturer’s instructions to achieve the best results.
This process opens up a new realm of customization for those looking to add layers, textures, or additional colors to their already transferred designs.
The Basics Of Iron-on Transfers And Paint
Welcome to a colorful exploration of the basics of iron-on transfers and paint. Dive into the world of DIY customization where vibrant colors meet endless creativity. Let’s decode the essentials for a successful paint-over-transfer project.
What Is An Iron-on Transfer?
Iron-on transfers are images or designs printed on special paper. You apply them to fabric using heat. They are fantastic for personalizing t-shirts, bags, and even home decor. Quick and easy, they make any item unique.
Types Of Paint Suitable For Fabric
Selecting the right paint type is crucial for fabric projects. Not all paints adhere well or last long on fabric. Below, find the best options for painting over iron-on transfers:
- Fabric Paint: Specifically made for textiles; resists washing and fading
- Acrylic Paint: Versatile and vivid but requires a fabric medium for flexibility
- Textile Medium: Transforms any acrylic paint into fabric paint
Consider each paint’s quality, color range, and drying time. Quality paint ensures vibrant, durable results. Test paint on a small area first. This will help avoid surprises after completing your project.
Prepping To Paint Over Iron-on
Revamping your fabric with a fresh coat of paint requires careful preparation, especially over an iron-on transfer. The right groundwork ensures your artwork sticks, looks professional, and lasts. Let’s dive into how to effectively prep your fabric for that new burst of color!
Cleaning The Fabric
Starting with a clean canvas is crucial. Dirt or grease can prevent paint from properly adhering. Follow these steps to ensure your fabric is pristine:
- Gently hand-wash the fabric if it’s washable, using a mild detergent.
- Avoid fabric softeners as they may leave a residue that repels paint.
- For non-washable materials, use a spot cleaner or damp cloth to dab away impurities.
- Allow the fabric to completely dry before moving on to painting.
Selecting The Right Brushes
Brush selection can make or break your painting project. Consider these tips for choosing the perfect brush:
| Brush Type | Best Use |
|---|---|
| Synthetic Brushes | Suitable for smooth paint application on fabric |
| Natural Bristles | Good for textured effects |
| Sponge Brushes | Perfect for blending and base coats |
Match the brush size to the project scale for better control. Ensure brushes are clean before starting to paint.
Choosing The Right Type Of Paint
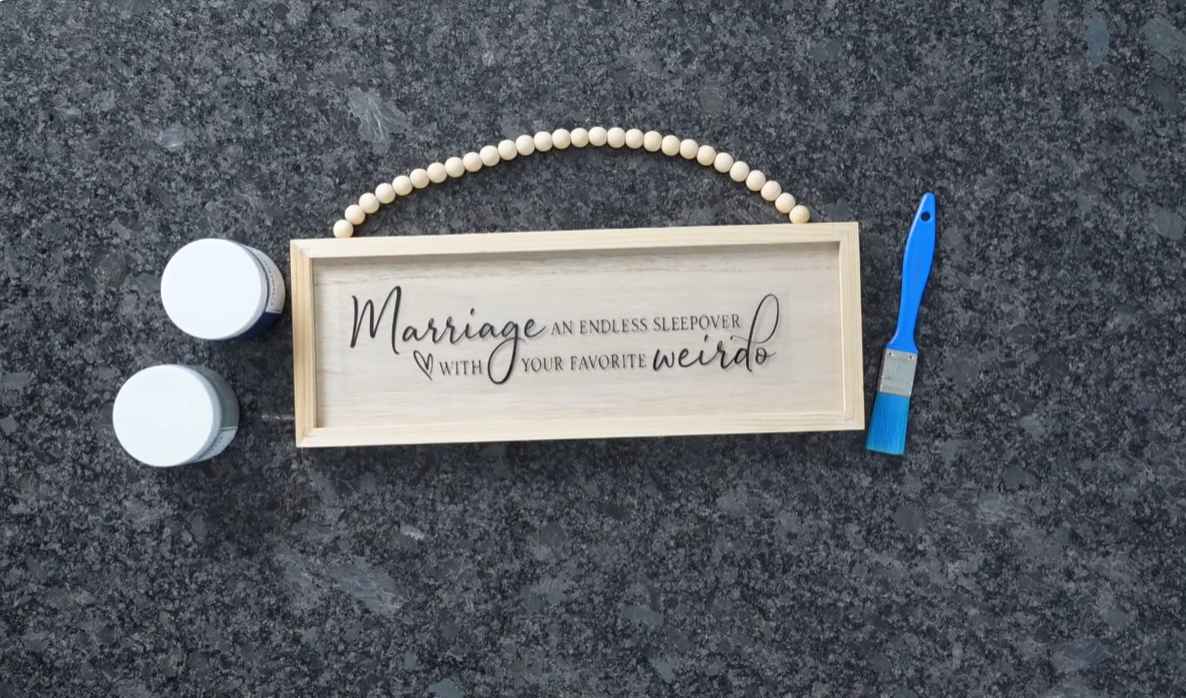
Transforming a piece with iron-on transfers? The paint you choose makes all the difference! Let’s dive into the world of fabric and regular paints to ensure your work shines.
Fabric Paint Vs. Regular Paint
Fabric paint is specially formulated to bond with textiles, providing flexibility and washability. This makes it the go-to option for painting over iron-on transfers. Regular paint, while not designed for fabric, might seem convenient but can crack and wear off quickly.
- Fabric paint: Bonds well, stays flexible, survives washing
- Regular paint: May crack or peel, less durable on fabric
Testing Paint Adherence
Before going full scale, let’s test! You wouldn’t want your masterpiece to flake off after the first wash. On a small area:
- Apply a patch of paint.
- Let it dry.
- Check for cracking or peeling.
Successful adherence? You’re set to paint the rest! If not, reconsider your paint choice or iron-on transfer material.
The Painting Process Explained
Welcome to our latest guide on repurposing your iron-on transferred fabrics. The Painting Process Explained section will dig into how you can add a splash of color to your already decorated items.
Perhaps you want to refresh an old design or simply add new touches to your fabric. Whichever it is, understanding the right way to paint over iron-on transfers is key to a successful project.
Step-by-step Guide
- Choose the Right Paint: Fabric or acrylic paints work best.
- Prep the Area: Place cardboard inside the fabric to prevent bleed-through.
- Test the Paint: Try it on a scrap piece to see the final look.
- Apply the Paint: Use a soft brush or sponge for even coverage.
- Let It Dry: Allow the paint to dry completely before touching it.
- Heat Set: If necessary, follow paint instructions to heat set.
- Final Check: Look for any missed spots or areas needing a touch-up.
Avoiding Common Mistakes
- Skipping Prep Work: Always prepare the fabric properly.
- Using Too Much Paint: Apply thin layers to prevent cracking.
- Forgetting to Heat Set: This secures the paint onto the fabric.
- Ignoring Drying Time: Patience is essential for full drying.
- Overlooking Fabric Type: Consider the material before painting.
Layering Techniques For Opacity
Layering Techniques for Opacity transform the way creatives work with iron-on transfers. Perfect for breathing new life into fabric pieces, these methods ensure bold, clear results. Understanding how to build color layers and apply them evenly is key for a professional-looking finish.
Building Color Layers
Creating vibrant designs on iron-on transfers starts with building color layers. This technique enhances the intensity of the image. Start with lighter colors as a foundation. Gradually add darker shades for depth. Allow each layer to dry before adding the next one. This prevents colors from bleeding into each other.
- Begin with light tones
- Add dark colors for contrast
- Allow drying between layers
Tips For Even Application
To ensure an even application of paint on iron-on transfers, follow these simple tips:
- Use a flat brush for broad strokes
- Apply thin, consistent coats of paint
- Smooth out any bubbles or creases immediately
Even application prevents peeling and cracking, ensuring your design lasts longer on the fabric. Don’t rush the process. Take the time to smooth out each layer for optimal results.
Drying And Curing Painted Transfers
Transforming your fabrics with iron-on transfers and a splash of paint can be exciting. Yet, the crucial steps of drying and curing the painted transfers are often overlooked.
These processes are vital to ensure that your masterpiece lasts, avoiding any peeling or fading.
How Long To Let Paint Dry
The wait can be challenging but patience is key when allowing paint to dry over iron-on transfers. Thin layers take less time and can dry within minutes. However, thicker coats or humid conditions extend drying times. A good rule of thumb is to wait at least 24 hours before touching or adding another layer.
- Airflow aids drying. Keep the area well-ventilated.
- Avoid direct sunlight as it may cause uneven drying.
- Check the paint’s surface by lightly touching the edge.
- If no paint comes off, it’s safe to add another coat.
Heat-setting The Paint
After the paint dries, heat-setting is your next move. This process helps the paint bond with the fabric. Use a dry iron on a no-steam setting. Place a thin cloth or parchment paper over the painted area.
- Gently iron over the cloth for 3 to 5 minutes.
- Focus on one section at a time for even curing.
- Ensure not to overheat as it may damage the transfer.
Allow the fabric to cool. Then, admire your work. The paint should now be more durable and wash-resistant.
Tips For Maintaining Painted Transfers
Tips for Maintaining Painted Transfers can extend the life of your unique clothing creations. Whether you’ve decided to paint over an iron on transfer to refresh its look or add your personal touch, proper maintenance is key. These tips keep your painted garments looking fresh and vibrant wear after wear.
Washing And Care Instructions
Keep your painted transfers in top-notch condition with the right cleaning techniques:
- Turn clothing inside out before washing. This protects the design.
- Use cold water settings on your machine. Hot water can harm the paint.
- Set your machine on a gentle cycle. This prevents the paint from cracking.
- Avoid bleach and fabric softeners. They can cause the paint to fade or peel.
- Hang to dry. Tumble dryers may damage the paint.
What To Avoid
Prolong your painted transfer’s life by avoiding common pitfalls:
- Don’t iron directly over a painted transfer. It can melt.
- Avoid stretching garments with painted transfers when wet. It can distort the design.
- Direct sunlight for extended periods fades paint. Store items in a cool, dark place.
- Harsh chemicals or rough surfaces can scrape off paint. Treat gently.
Fixing Mistakes And Repairs
Imagine finally creating the perfect iron-on transfer, only to discover a pesky smudge or leak that mars your masterpiece. Occasionally, mistakes happen during the application process. But worry not! There are methods for fixing imperfections and bringing your creation back to its intended glory. Dive into the world of Fixing Mistakes and Repairs for iron-on transfers, and you’ll learn how to make your projects flawless once more.
Correcting Smudges And Leaks
Discovered a smudge or a color leak? Acting quickly often gives the best chance of remedy. Lay the fabric flat and gently dab the area with a cotton swab dipped in rubbing alcohol. This technique can lighten the problem area without spreading the color further.
- Act swiftly to address the unwanted marks.
- Avoid rubbing, which can spread the ink.
- Test on a hidden area first to ensure fabric safety.
Touch-up Techniques
When touch-ups are needed, precision is key. Use fine-tipped fabric markers that closely match the colors of your design. Carefully fill in areas where the color didn’t transfer properly. For larger mistakes, consider creating a new, small transfer to cover the flawed area partially or entirely.
| Tool | Use | Tip |
|---|---|---|
| Fabric Markers | Fill in small gaps in the design | Choose the right color |
| Iron-on Patches | Cover larger mistakes | Match the design’s style |
| Alcohol Swabs | Lighten smudges or leaks | Use with care |
Patch or recreate areas that need a second chance. Use a heat press if possible for more control and better adhesion. Allow your fixes to set and cure according to transfer instructions. Your iron-on transfer can still turn out beautifully, even after addressing unexpected mistakes.
Alternative Methods And Creative Ideas
You’ve mastered the art of iron-on transfers. But what’s next? Let’s dive into some thrilling alternatives and creative ideas. These techniques will revital our fabric adventures. Imagine transforming that favorite tee into a canvas of endless possibilities. Ready?
Using Stencils Over Transfers
Stencils offer a fresh breath to your fabric’s look. Layer them over old transfers for a unique twist. With stencils, we can:
- Choose shapes and designs that speak to us.
- Combine colors that pop and contrast beautifully.
- Apply different paint types for texture and dimension.
Here’s a quick guide to stencil magic:
- Place the stencil over the transfer.
- Dab fabric paint on the open areas.
- Let it dry and peel away to reveal your creation!
Mixing Media On Fabric
Mix media art brings texture and depth. It’s a playground for creativity on tees. To start, we’ll need:
- Fabric markers for fine lines.
- Embroidery for tactile appeal.
- Sequins and beads for sparkle.
Blend these elements for a mixed-media masterpiece. Here’s a simple layout:
| Element | Application | Effect |
|---|---|---|
| Fabric Paint | Base layer | Color background |
| Markers | Detailing | Sharp accents |
| Embroidery | Textures | Raised patterns |
| Beads | Embellishments | Shiny touch |
Frequently Asked Questions Answered: Can You Paint Over Iron On Transfer
Can You Paint Over A Photo Transfer?
Yes, you can paint over a photo transfer. Ensure the transfer is completely dry and sealed before applying acrylic or oil paints for best results. Use gentle brush strokes to maintain the image beneath.
Can You Paint Over Htv?
Yes, you can paint over HTV (heat transfer vinyl), but use fabric paint and apply it carefully to avoid cracking. Always test on a small area first.
Will Acrylic Paint Stick To Vinyl Fabric?
Yes, acrylic paint can stick to vinyl fabric, but it requires proper surface preparation and sealing. Use a primer designed for vinyl and finish with a sealant to ensure durability.
Is There Fabric Paint That Doesn’t Wash Off?
Yes, permanent fabric paint is designed to withstand washing. Apply it according to instructions, and heat-set if required, for durability.
Conclusion
Wrapping up, and painting over an iron-on transfer is feasible with the right approach. Ensure your materials and prep work align for best results. Patience and careful application are key. With these tips, your project is set for success. Ready to reinvent your item?
Grab a brush and let the creativity flow!
